Within this function you will Create New Vendor Master Files, as well as View or Edit Existing Vendor information. Below are the input screens for each type of vendor information with instructions.
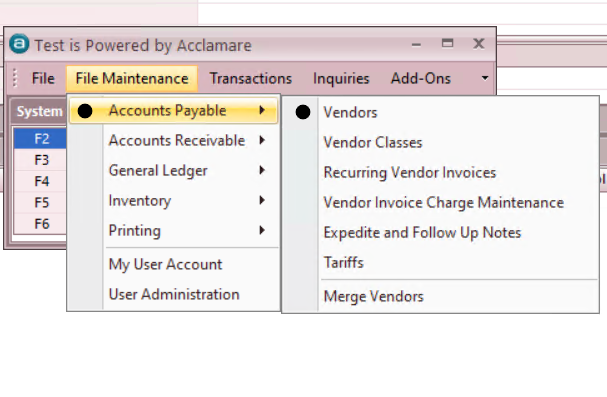
- File Maintenance > Accounts Payable > VENDOR
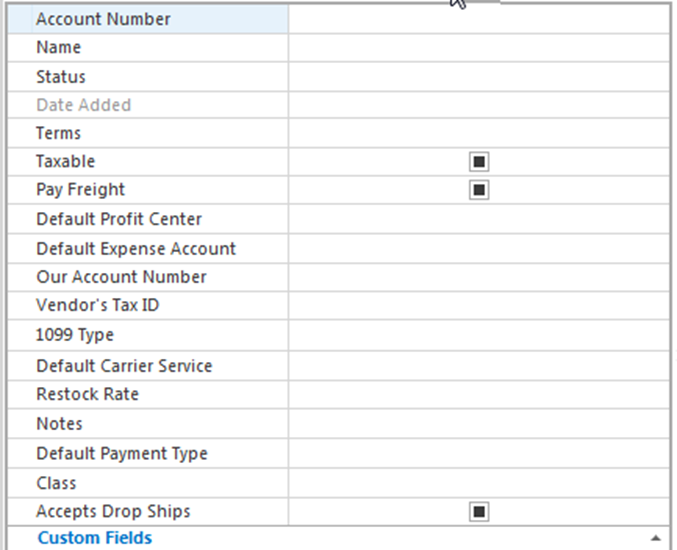
- Account Number – This is a required field. Account Numbers are user defined and can be up to 50 characters in length, both alpha and numeric values are acceptable.Name – Vendor Company NameStatus – Choices are OPEN, HOLD or CLOSED. Select from drop down menu.Date Added – this is system generated.Terms – Payment terms offered by the Vendor. Select from drop down menu.Taxable – Check box for YES if our purchases from this Vendor are taxable.Pay Freight – Check box for YES if we pay freight charges from this Vendor.Default Profit Center – This value can be populated to speed the entry of the vendor invoices when entering individual amounts in the CHARGES section of the vendor invoice interface.Default Expense Account – This is the GL expense account to which purchases from this Vendor will normally be coded. Select from drop down menu.Our Account Number – This is the Vendor assigned number for our account with them and will print on the checks issued to the Vendor if necessary.Vendor’s Tax ID – This is the vendor’s Federal Employer Identification Number (EIN) or the Social Security Number for individuals.1099 Type – Select the IRS Code from drop down menu for type of 1099 this Vendor will receive. If they do not receive a 1099 from us, select “N” for None.Default Carrier Service – This is the standard carrier service used by this Vendor for our shipments. Select from drop down menu.Restock Rate – This is the default restock rate charged by this vendor and can be overwritten at the line level on VRA’s when required.Notes – Enter any special information or instructions specific to this vendor that you want to maintain as history in the master file.Default Payment Type – Select standard method of payment from drop down menu. Selection should be CHECK unless otherwise instructed.Class – Used to separate Trade Suppliers from Office Expense Suppliers. Select from drop down.Accepts Drop Ships - Check box for YES if this Vendor will accept orders for Drop Shipment to our Customer.
- VENDOR ADDRESS INFORMATION
- Address / City / State / Zip / Country - Enter the entire address information where the Purchase Orders should be sent. This will print on the PO.Phone Number – Enter the phone number for the Vendor sales support contactFax Number – Enter the fax number for the Vendor sales support contact*.*
NOTE: This does not need to be the same as the fax number used to send Purchase Orders. Document Setting Maintenance will control that function.
- Web Site – Enter the Vendor’s web site if provided.Email Address – Enter the e-mail address for the Vendor sales support contact*.*
NOTE: This does not need to be the same as the e-mail address used to send Purchase Orders. Document Setting Maintenance will control that function.
- PAYEE ADDRESS INFORMATION
- Same as Vendor – Check box for YES if payments are sent to same address as Purchase Orders. This will automatically populate the fields below.If address for payments is different - Complete Address / City / State / Zip / Country with the PAY TO address information. This will print on your checks to the Vendor.
VENDOR MASTER FILE MAINTENANCE - This sub-menu within the Vendor Master File includes various settings for the Vendor that can be created, viewed or edited as required.
- TARGETS
- DISCOUNTS
- FAMILIES
- VENDOR CONTACT MAINTENANCE – is where you will create, view or edit individual contacts for a Vendor. This contact information can be used by other transactions to enable you to select a contact for document transmittal, such as Purchase Orders or Expediting Requests.
- The first contact built for a vendor will automatically bring up the fields to fill when you open Contacts from the Maintenance Menu in the Vendor Master File.
- Enter contact name in the left panel and complete all remaining fields possible in the right panel.
- To add more contacts, Click on the icon for New Transaction and repeat steps as above.
- VENDOR ALERT MAINTENANCE
- This is used to create, view or edit Alert Messages for a Vendor.
- Click on the icon for New Transaction to add a new message.
- Check box for YES if this is a “Must Read” type of alert.
- Complete the remaining fields for Date Created On and Date Expires On.
- REBATE MAINTENANCE
- This is used to create, view or edit Rebate Programs offered by a Vendor.
- VENDOR DOCUMENT SETTINGS
-
This is used to of documents to the Vendor.
control the delivery
-
Click on the icon for New Transaction to add a new document type.
-
Select the Delivery Method from the drop down menu – choices are PRINT, EMAIL, EMAIL & PRINT, FAX and FAX & PRINT.
-
Select the Printer from a drop down menu if different from the Default.
-
Complete the remaining fields with the e-mail and/or fax number provided by the Vendor.